Sweet Potato Recipe: 5-Minute Sweet and Sour Snack
The crunch in this sweet potato recipe depends on something that happens before the pan even gets hot. I boil the sweet potato only until it is cooked but still firm, then let the surface dry before slicing it. If it becomes completely soft, the pieces start breaking as soon as I try to turn them.
Once that part is right, the pan work is quick. I shallow-fry the slices in one tablespoon of desi ghee, add sesame seeds and a little jaggery powder, season them with black salt, and finish with lemon. The result is sweet, sour and lightly crisp around the browned edges.
I call this a five-minute winter snack because the final pan step takes about five minutes in my kitchen. That does not include boiling and drying the sweet potato. I would rather make that distinction clearly than promise a five-minute recipe from an entirely raw ingredient.
The short version
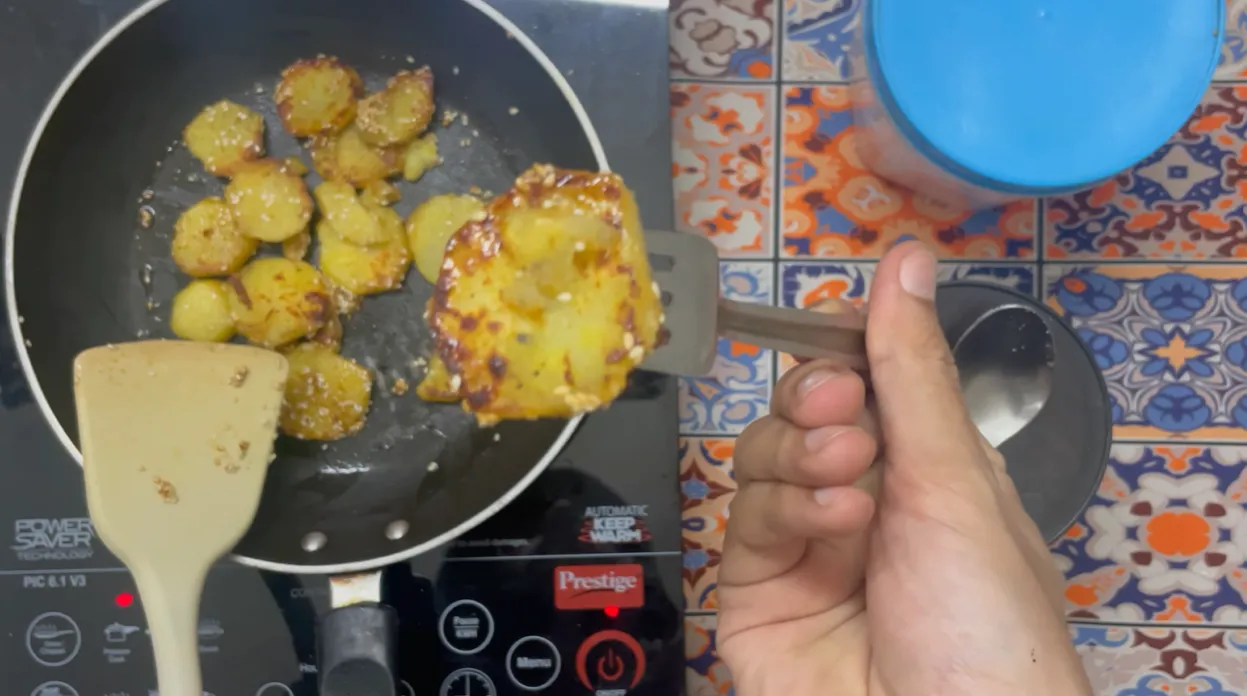
For this sweet potato recipe, boil one sweet potato until just firm, dry it and cut it into thick rounds. Shallow-fry the pieces in one tablespoon of ghee until lightly brown on both sides. Add one tablespoon each of sesame seeds and jaggery powder, a pinch of black salt and optional chaat masala. Toss briefly, switch off the heat and finish with lemon.
This is not a deep-fried snack, but it still uses ghee and jaggery, so I would not describe it as a free-pass health food. It is a simple homemade option built around one sweet potato, with measured additions and no batter. That is the useful claim. The taste matters too.
Ingredients I used
The ingredient list for this sweet potato recipe is deliberately short. I used one sweet potato as the base and measured the sesame and jaggery according to that amount. Sweet potatoes vary in size, so use the spoon quantities as the record of my batch rather than a universal ratio for every potato.
| Ingredient | Quantity | What it does |
|---|---|---|
| Sweet potato | 1 | The main ingredient, boiled until cooked but still firm |
| Desi ghee | 1 tablespoon | Used for shallow-frying and browning the slices |
| Sesame seeds | 1 tablespoon | Adds a second kind of crunch |
| Jaggery powder | 1 tablespoon | Strengthens the sweet side of the flavour |
| Black salt | A pinch | Adds a sharper, savoury note |
| Chaat masala | Optional, to taste | Adds extra tang and spice |
| Lemon | A little, to finish | Balances the jaggery and natural sweetness |
I used jaggery powder because it spreads quickly through the warm pan. Crushed jaggery can work too, but large hard pieces will not coat the slices evenly during such a short finish. Crush it finely before adding it.
Black salt fits this version better than ordinary salt for me because it gives the snack a familiar chaat-like edge. Regular salt is still usable. Keep the amount small either way, especially if you also add chaat masala.
Do not overboil the sweet potato
In this sweet potato recipe, this is the part I would watch most closely. The sweet potato must be cooked enough to eat, but it should not collapse when touched. In the video, the boiled slices are firm enough to lift from the plate and place individually in the pan.
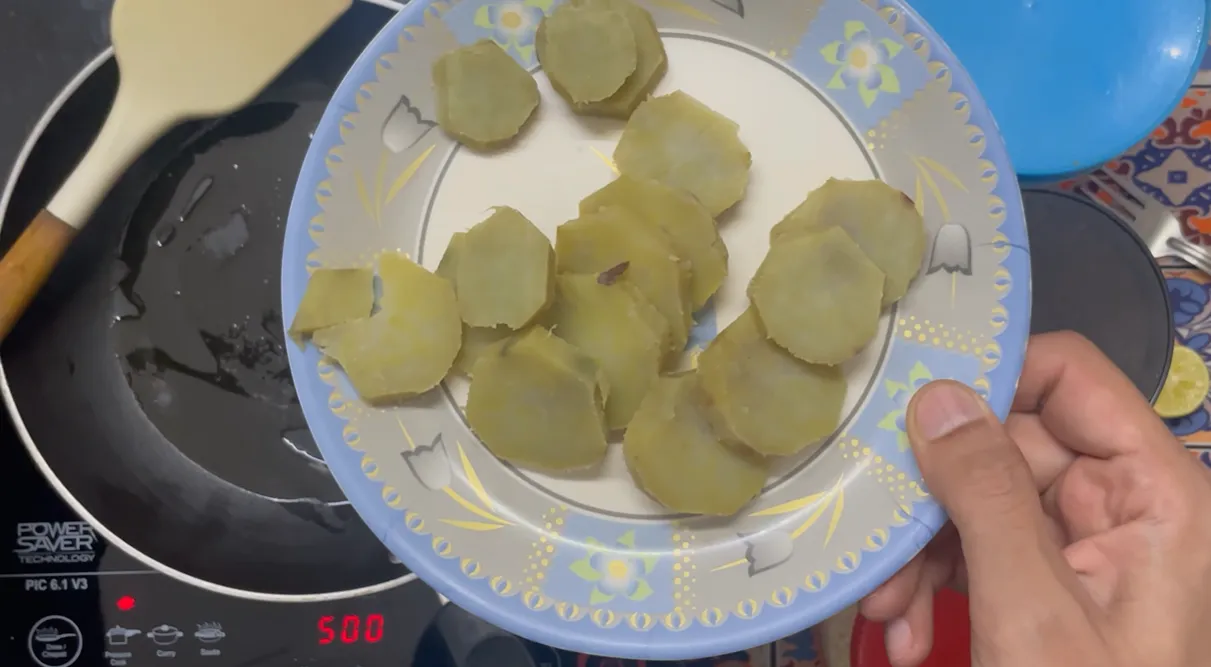
You can boil it in a pressure cooker, in a pan with water, or by another method you normally use. I am not attaching an exact whistle count because the video does not establish one, and different cookers behave differently. The reliable check is texture: a knife should enter, but the potato should not feel ready to mash.
After boiling, let the sweet potato cool enough to handle. Peel it, cut thick pieces and blot the surface with a paper towel. That drying step helps because boiled sweet potato carries moisture. A wet surface is more likely to stick and steam than to pick up a light crust.
Why I used a non-stick pan
For this sweet potato recipe, even after drying, a little moisture remains in the slices. Sweet potato is also softer and more delicate than a raw potato going into a long fry. A non-stick pan makes it easier to turn the pieces without leaving their browned surface behind.
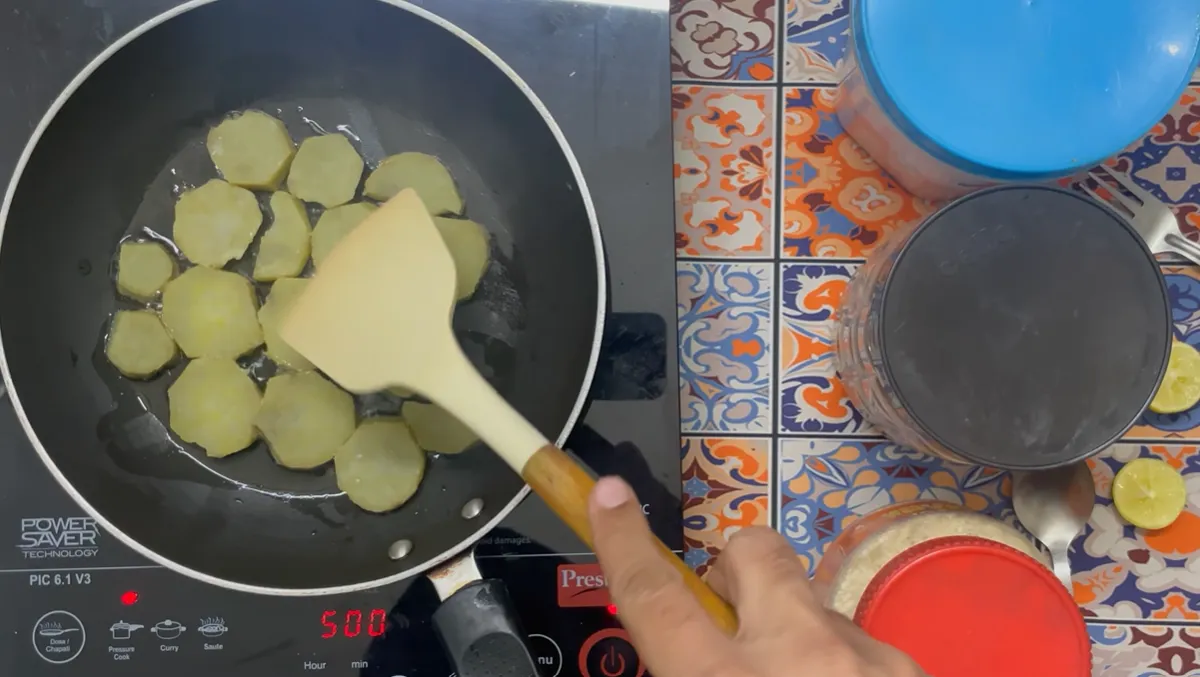
Add one tablespoon of ghee and spread the slices in a single layer where possible. Crowding is not disastrous for this small batch, but the pieces touching the pan directly will brown more evenly. Keep an eye on the underside rather than moving everything constantly.
Once a light brown colour appears, turn the pieces gently. A flat spatula is useful here. If a slice starts breaking, it may have been boiled too far, or it may need another moment to form a surface before being lifted.
How brown should the slices become?
For this sweet potato recipe, I stop at a patchy golden-brown colour. The pieces do not need to become dark or hard. This recipe is meant to have a thin browned layer outside with a soft interior, not the dry crunch of a packaged chip.
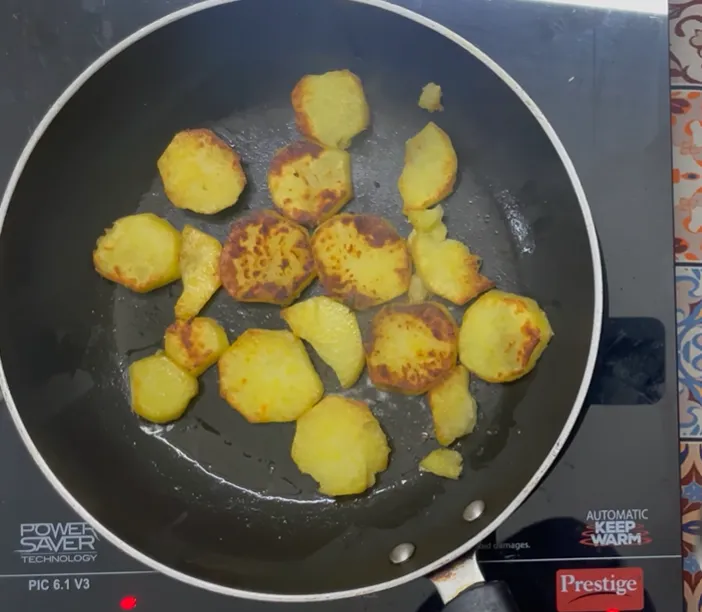
There is a small judgement call here. Browning adds flavour and a little texture, but another minute can turn fragile edges into broken pieces. I prefer to stop slightly early, especially because the ingredients still need to be tossed through the pan.
The phrase “crispy sweet potato” can create the wrong expectation if it suggests a rigid fried shell. Mine is lightly crisp at the browned points. The centre remains soft. That contrast is what worked in this batch.
Adding sesame, jaggery and lemon
When this sweet potato recipe is almost ready, scatter in one tablespoon of sesame seeds. They give the snack small, nutty pops of texture rather than changing the whole flavour. Then add one tablespoon of jaggery powder and a pinch of black salt.
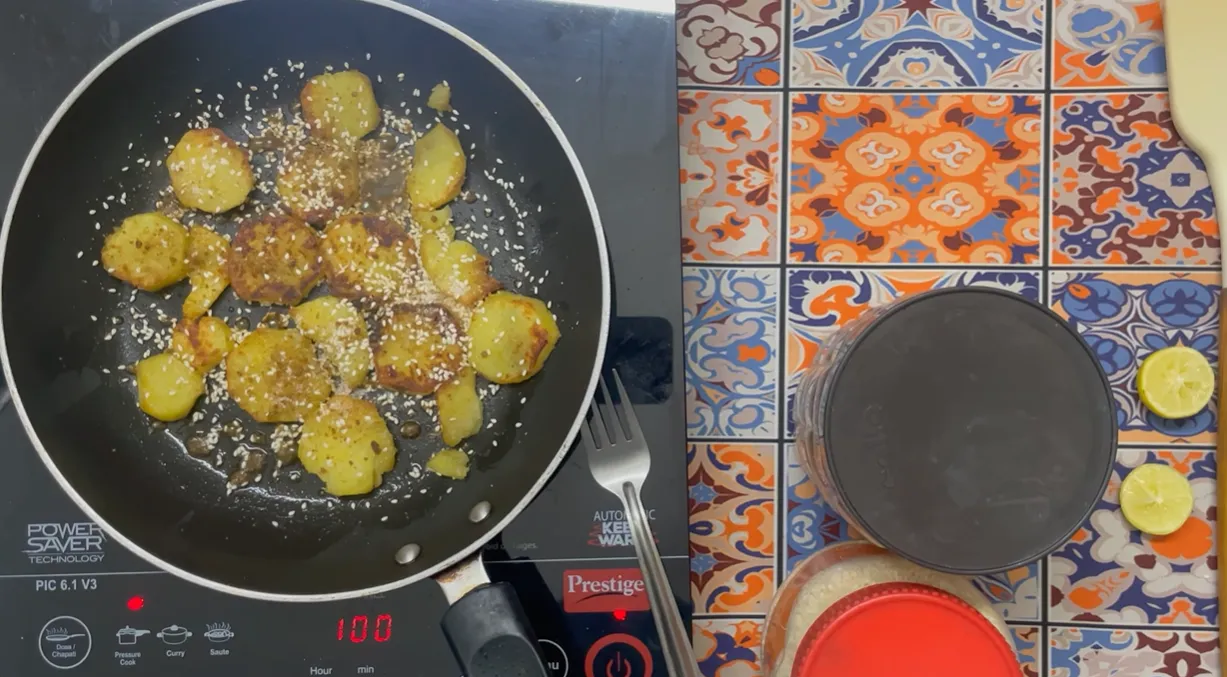
If you want it more chatpata, add a little chaat masala. I would start cautiously because the black salt is already present. Toss just enough to distribute everything. Jaggery can catch on a hot pan, so this is not the moment to walk away or keep cooking for several minutes.
Lemon goes in at the end. Its acidity cuts through the ghee and sweetness, which is why the finished snack tastes sweet and sour rather than simply sugary. Add a modest squeeze first, taste, and then decide whether it needs more.
My complete cooking method
- Boil one sweet potato until cooked but still firm. Do not take it to a mashable texture.
- Let it cool, peel it and cut it into thick slices.
- Blot the surface moisture with a paper towel.
- Heat one tablespoon of desi ghee in a non-stick pan.
- Place the slices in the pan and shallow-fry without moving them constantly.
- When the underside turns lightly brown, flip each piece gently.
- Cook the second side until patchy golden-brown areas appear.
- Add one tablespoon of sesame seeds.
- Add one tablespoon of jaggery powder and a pinch of black salt.
- Add a little chaat masala if you want a stronger savoury-tangy flavour.
- Toss briefly so the slices are coated without breaking.
- Switch off the heat, add lemon and serve while the browned surface is still fresh.
The five-minute description applies from the shallow-frying stage once the boiled, dried slices are ready. Your pan size, slice thickness and heat level can shift that timing. Colour and texture are safer guides than forcing the process to finish against a timer.
Three mistakes that change the result
Boiling until the sweet potato falls apart
Very soft pieces absorb handling badly. They split while being flipped, and the finished pan can turn into a rough mash with browned fragments. Stop boiling while there is still some firmness.
Putting wet slices straight into the pan
Surface water works against browning and increases the chance of sticking. Let the boiled potato release steam, then blot it. You do not need to dry it for hours, but the outside should not be visibly wet.
Adding jaggery too early
In this sweet potato recipe, the sweet potato needs time against the pan before the jaggery arrives. If the powder goes in at the start, it may darken or stick while you are still waiting for the slices to brown. Add it near the end and toss briefly.
Is this really a healthy winter snack?
I described this sweet potato recipe as a healthier winter snack in the video because it uses a whole sweet potato, a small ingredient list and shallow-frying rather than deep-frying. I would still keep the wording sensible. Ghee and jaggery contribute energy, and “healthy” depends on portion size, diet and individual needs.
The practical advantage is control. At home I know exactly what went into the pan: one tablespoon of ghee, one tablespoon of sesame, one tablespoon of jaggery powder, salt and lemon. There is no unknown batter or repeated frying oil. That does not turn it into medical nutrition advice, but it makes the snack easy to understand.
If you want a savourier result, reduce the jaggery rather than increasing every spice around it. If you want it sweeter, I would still avoid piling on jaggery before tasting the finished potato. The base ingredient already has its own sweetness.
What I would change next time
I would keep the same core method. The contrast of ghee-browned edges, sesame and lemon worked. The one variable I would adjust is the final seasoning after tasting the potato itself, because some sweet potatoes are noticeably sweeter than others.
I would also cut the slices to a more even thickness. A few irregular pieces in my pan browned faster and began to break while the larger rounds were still colouring. It did not ruin the snack, but even slices make the five-minute pan stage easier to control.
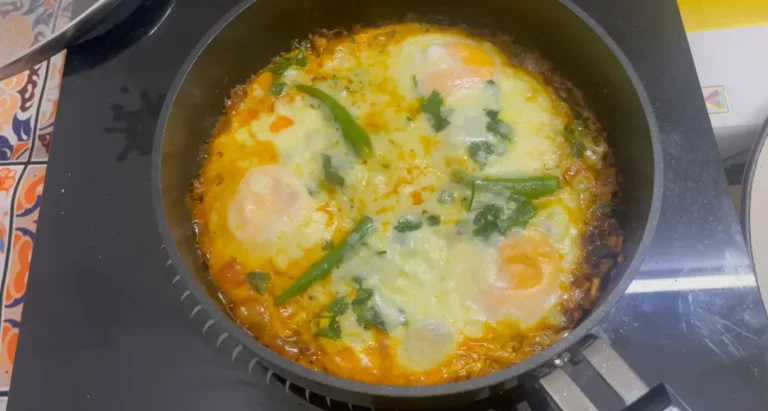
For another savoury one-pan option, my Indian-style egg shakshuka recipe uses a tomato base, eggs and cheese. If you want something warm and sweet for breakfast instead, the caramelised banana milk toast recipe takes a completely different route.
Questions I would check before cooking
Can I use oil instead of ghee?
You can use a cooking fat that suits you, but the flavour will differ from the version shown here. I used one tablespoon of desi ghee and have not presented another version as if I tested it.
Can I skip jaggery?
Yes, but the snack will no longer have the same sweet-and-sour balance. The sweet potato provides natural sweetness, while the tablespoon of jaggery in my batch made that side more pronounced.
Why add lemon after cooking?
I use lemon as the fresh sour finish. Adding it after the browning and brief toss keeps the flavour bright and avoids introducing extra liquid while I am trying to colour the sweet potato.
How do I keep the pieces from breaking?
Do not overboil them, dry the surface, use a non-stick pan and turn them gently with a flat spatula. Thick, even slices are easier to handle than thin or irregular pieces.
Is the whole recipe ready in five minutes?
No. The final pan stage takes about five minutes once the sweet potato has already been boiled, cooled, sliced and dried. Total preparation takes longer because the transcript does not establish a fixed boiling time.
The point where I stop cooking
I take the pan off once the jaggery and sesame have coated the browned slices and the lemon has balanced the sweetness. The sweet potato should still look like individual pieces. If it is turning into mash, it has already gone beyond the texture I wanted.
Serve this sweet potato recipe immediately. The browned layer is most noticeable while the slices are fresh from the pan, and that slight crunch is the whole reason I take care with boiling, drying and flipping. It is a small winter recipe, but the timing matters.